Each designer's Figma workspace eventually has a large number of files, projects, icons, etc. which form chaos and block them from quickly finding the info or assets they need right now. It becomes even more difficult to use Figma when several people work on a project and each of them organizes the workspace their own way.

If you work in a team, you MUST create a clear design workspace so that subsequent people in the team understand how everything works and where to look for everything they need.
Here's a simple guide on how to organize your workspace to work in Figma smoothly. Check it out!
Organize Figma Teams, Projects, and Files
Team Creation
It’s important to start working with the team in the right way.

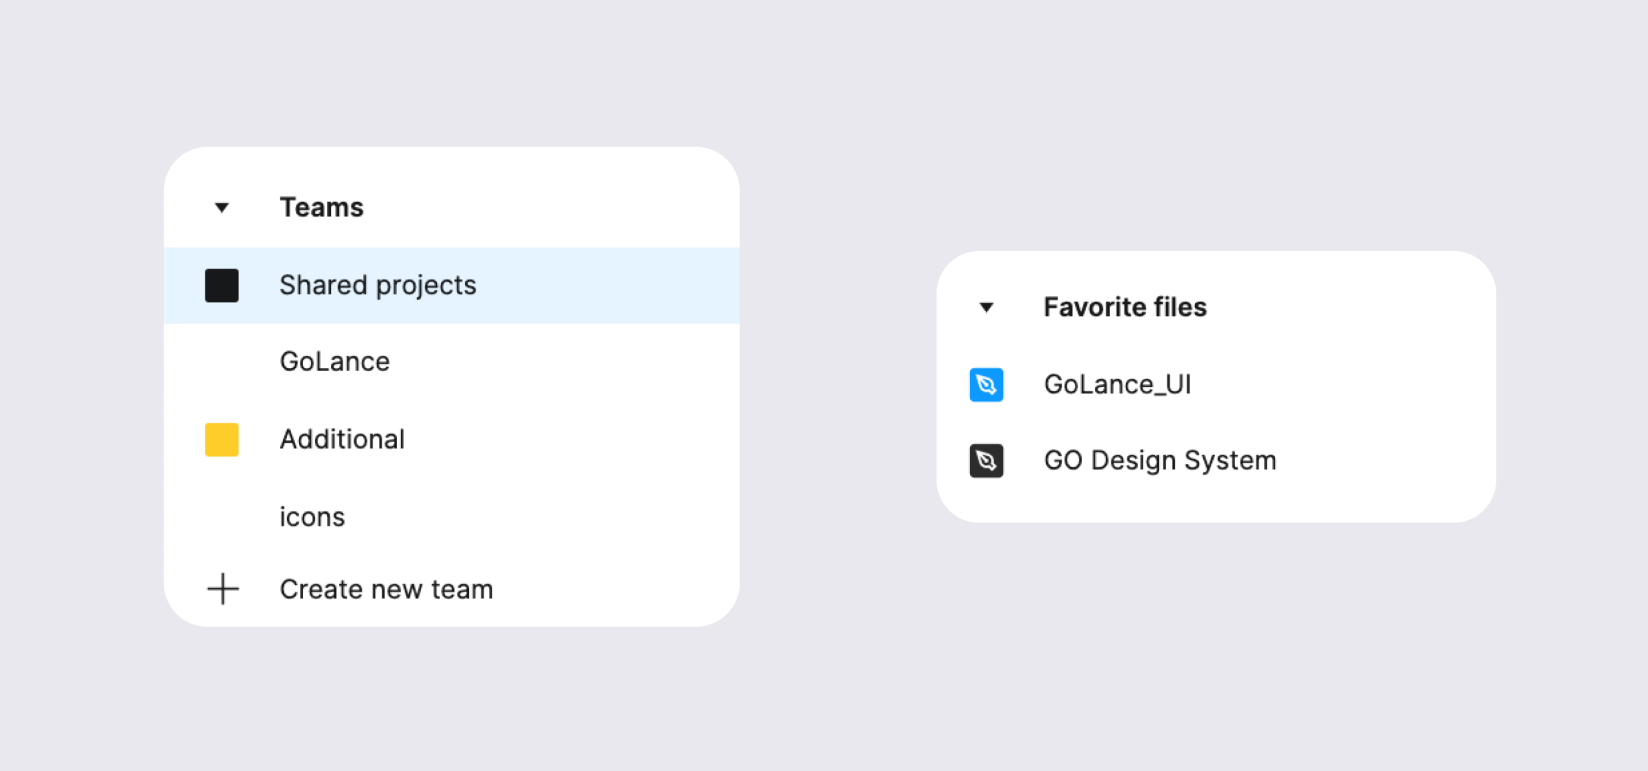
If you have a lot of designers working simultaneously, be sure to organize your folders according to various teams and projects.
For example, on the screen you can see Shared Projects (for members who are not the creators but are using the project) and Additional folders (for projects where the designer is a creator).
Project creation
In each of these teams, you can create a large number of projects with a large number of files (provided that Figma is paid). The free version has restrictions on the number of teams and files in them.
Favorite files
In Favorite Files, you can pin files that you use constantly. It’s a great feature to use to be able to get to the right project quickly.
Figma file organization in a project
When you open a project in a team, you can see all files belonging to this project. The example below shows how easy it is to navigate such a structure.

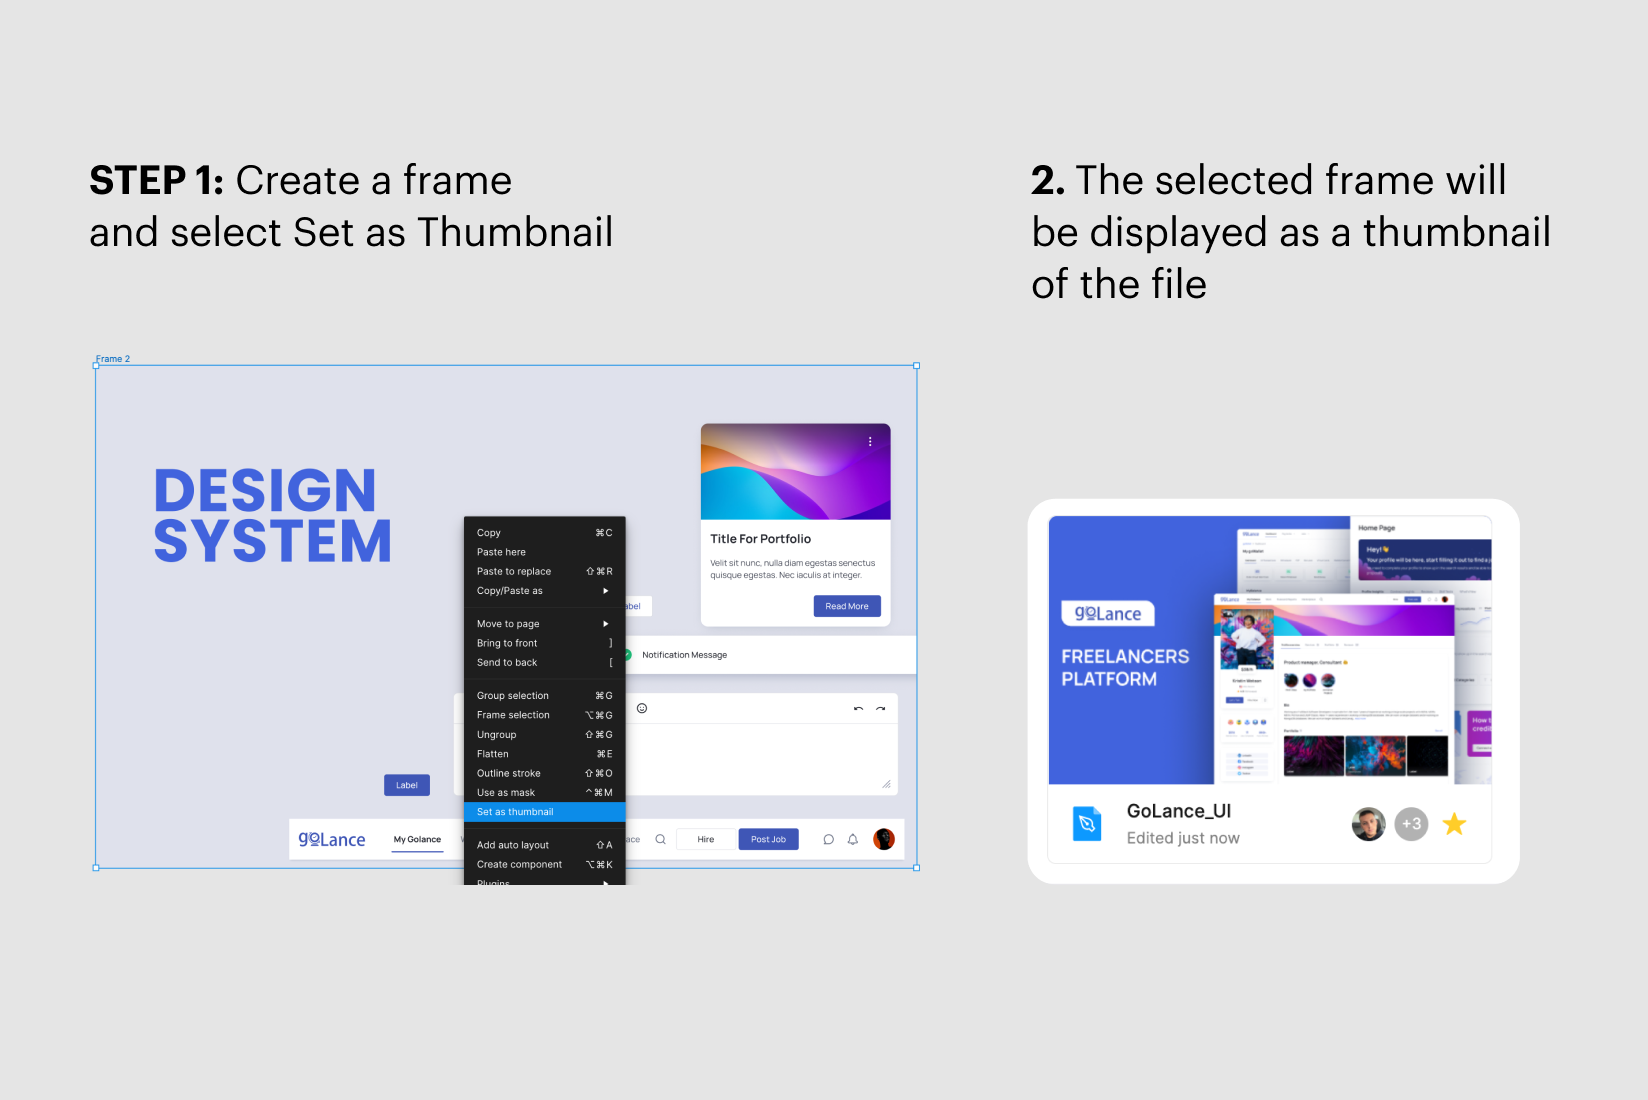
How to add a thumbnail image in Figma workspaces
As you can see, all the files in the above project have images. Add images to all important files for a quick and easy search for the items you need.
Adding images is easy:

Add to pinned and favorite files
Frequently used files can also be pinned to the top of the project, to do this, right-click on the file and select Pinned.
The pinned file will appear above other projects as the most important file for now.

To add a file to your favorites you need to follow the same steps, but select add to your favorite option (favorites are displayed on the left, not on the top).
Figma file organization & structure
After you figured out the main page and files, you need to properly organize the workspace inside the file.
Depending on the size of the project, the organization can be either page-by-page or global — one page with ready-made frames, a page with a UI kit, an archive page, etc.
“Folder” system organization
Unfortunately, a folder system with a tree has not yet been invented inside the file, so we need to work with the features Figma provides at the moment.
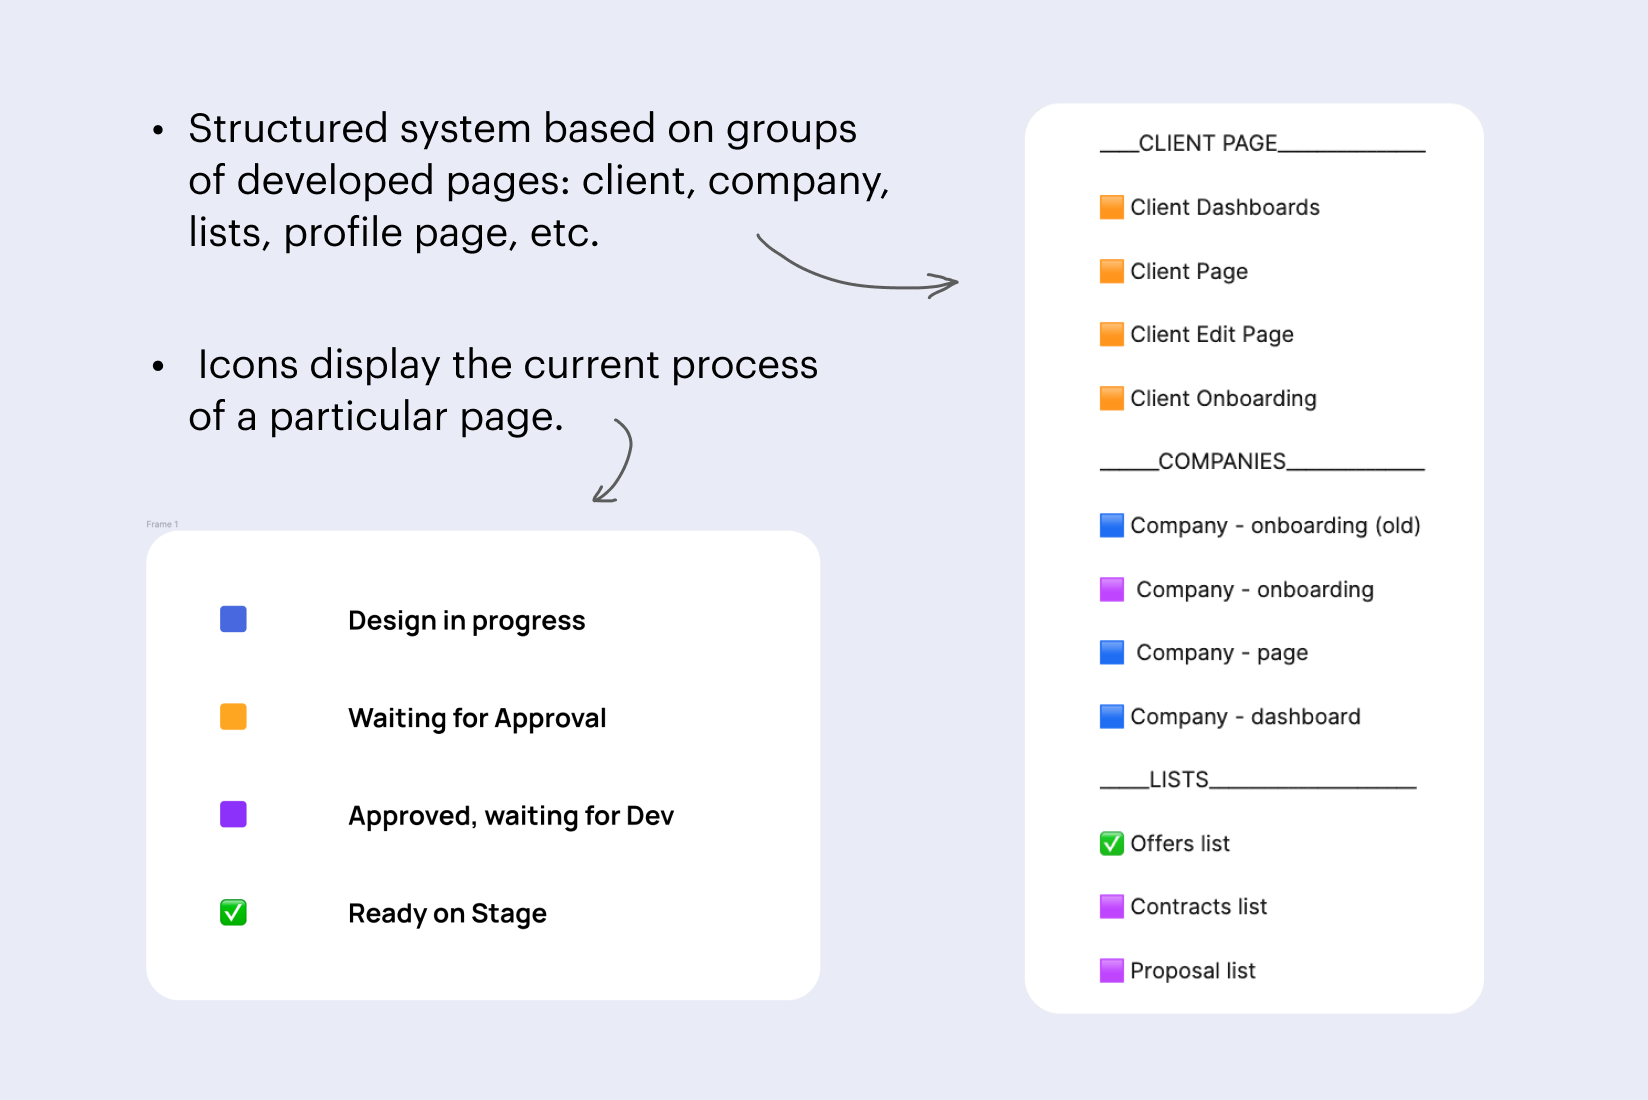
Sort all important pages according to categories. For example, in this case, sorting is done as follows:

Frame Status
Inside the page there is always a duplication of status icons you can look at.

Tips and tricks
- Always sign your files and components properly. Signing makes it easier to search through assets and the dedicated Figma Walker plugin.
- Don’t forget to sort the components in the UI kit by folders.
- Write down all changes in components and pages in the description field on the right. This will allow you to understand what and when has been changed.
- Many designers duplicate files to remember changes that were made a month or a year earlier. It is much more convenient to save to version History. To do so go into a File folder and choose the save to version history option.
Final thoughts on Figma workspace optimization
Organizing your work in Figma is not hard, but it will save your team a lot of time. Instead of searching for lost items you’ll be working on the actual products.
Proper organization of your documents and files will allow you to optimize the working process with other designers and frontend developers, so don’t forget to do it regularly.

.svg)


