Share if you like it!
And especially if you don't!

Object Detection from Image and Video using HSV Color Space

In this essay, we will see how to detect an object from video & image using HSV (hue, saturation, value) color space, OpenCV library in C++ and Python programming languages.
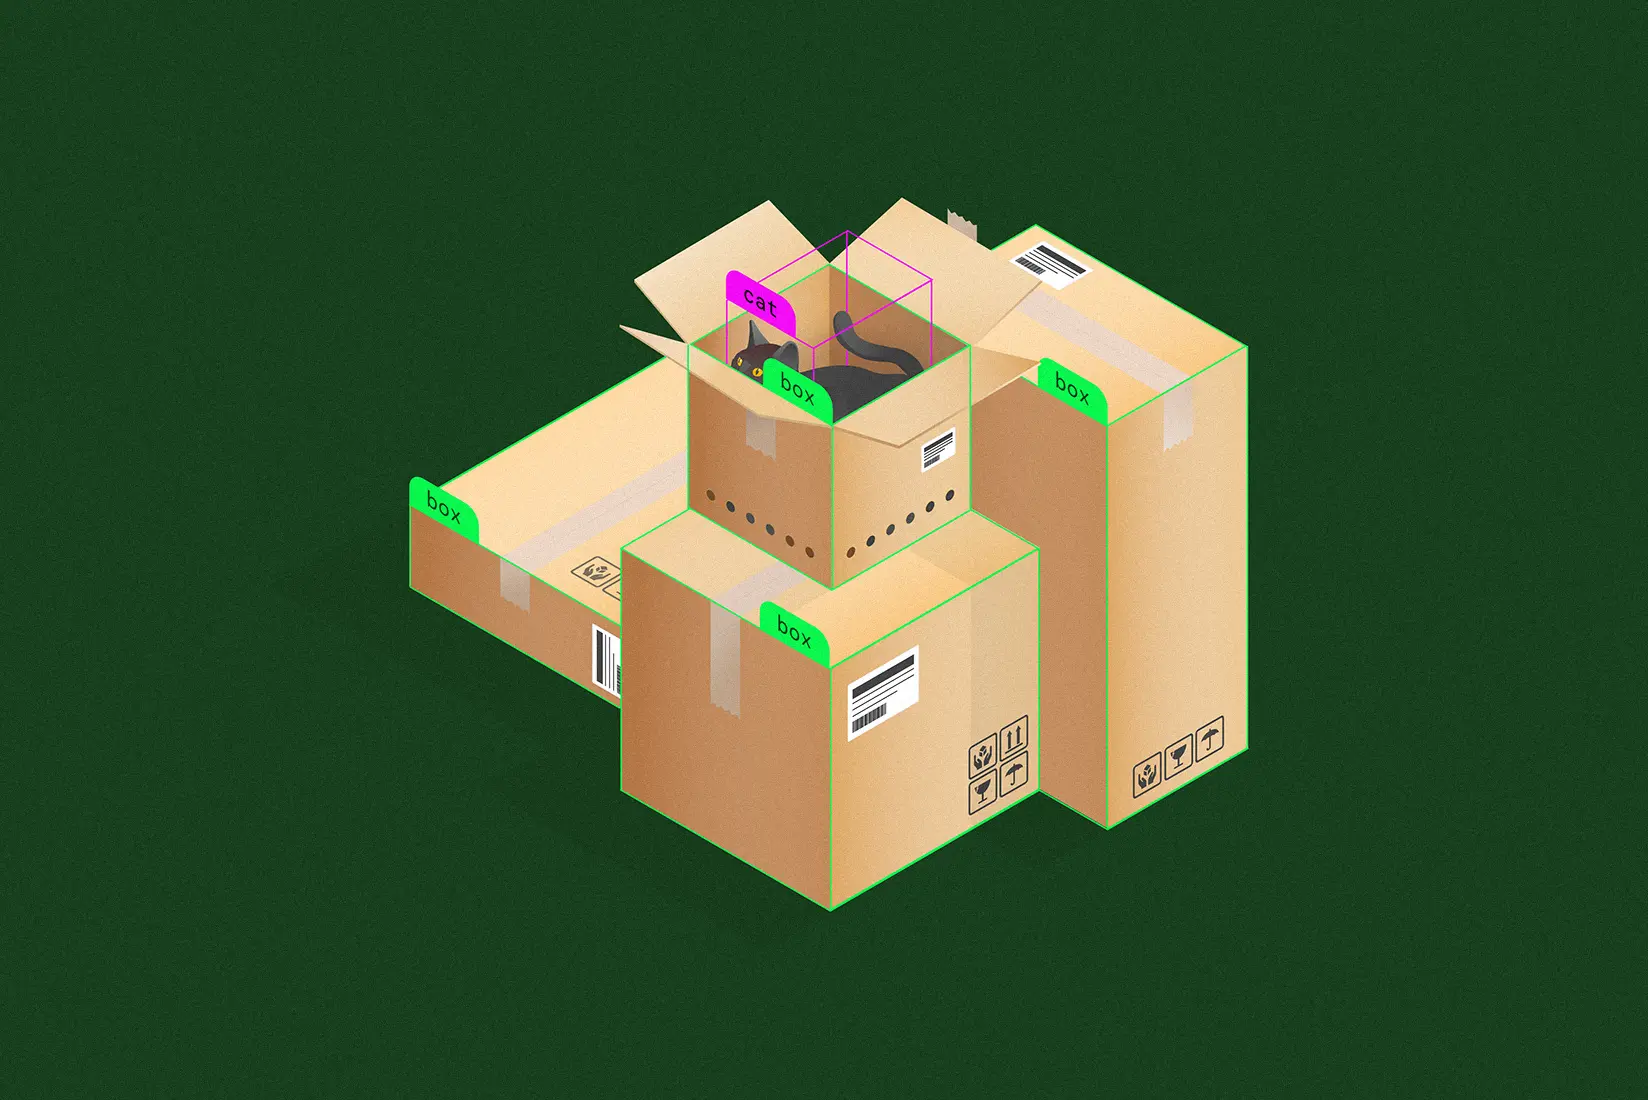
Let's first quickly explore how these two applications (detection from image and video) look in practice and then we will go over OpenCV, HSV color space and the C++ and Python code.

Applications: Object detection from image and video

Object detection from image:

In this first application, we have an adjustable HSV mask ("Set Mask" window) which masks the original image and produces a resulting masked image. More details on this can be seen in the code which is heavily commented.
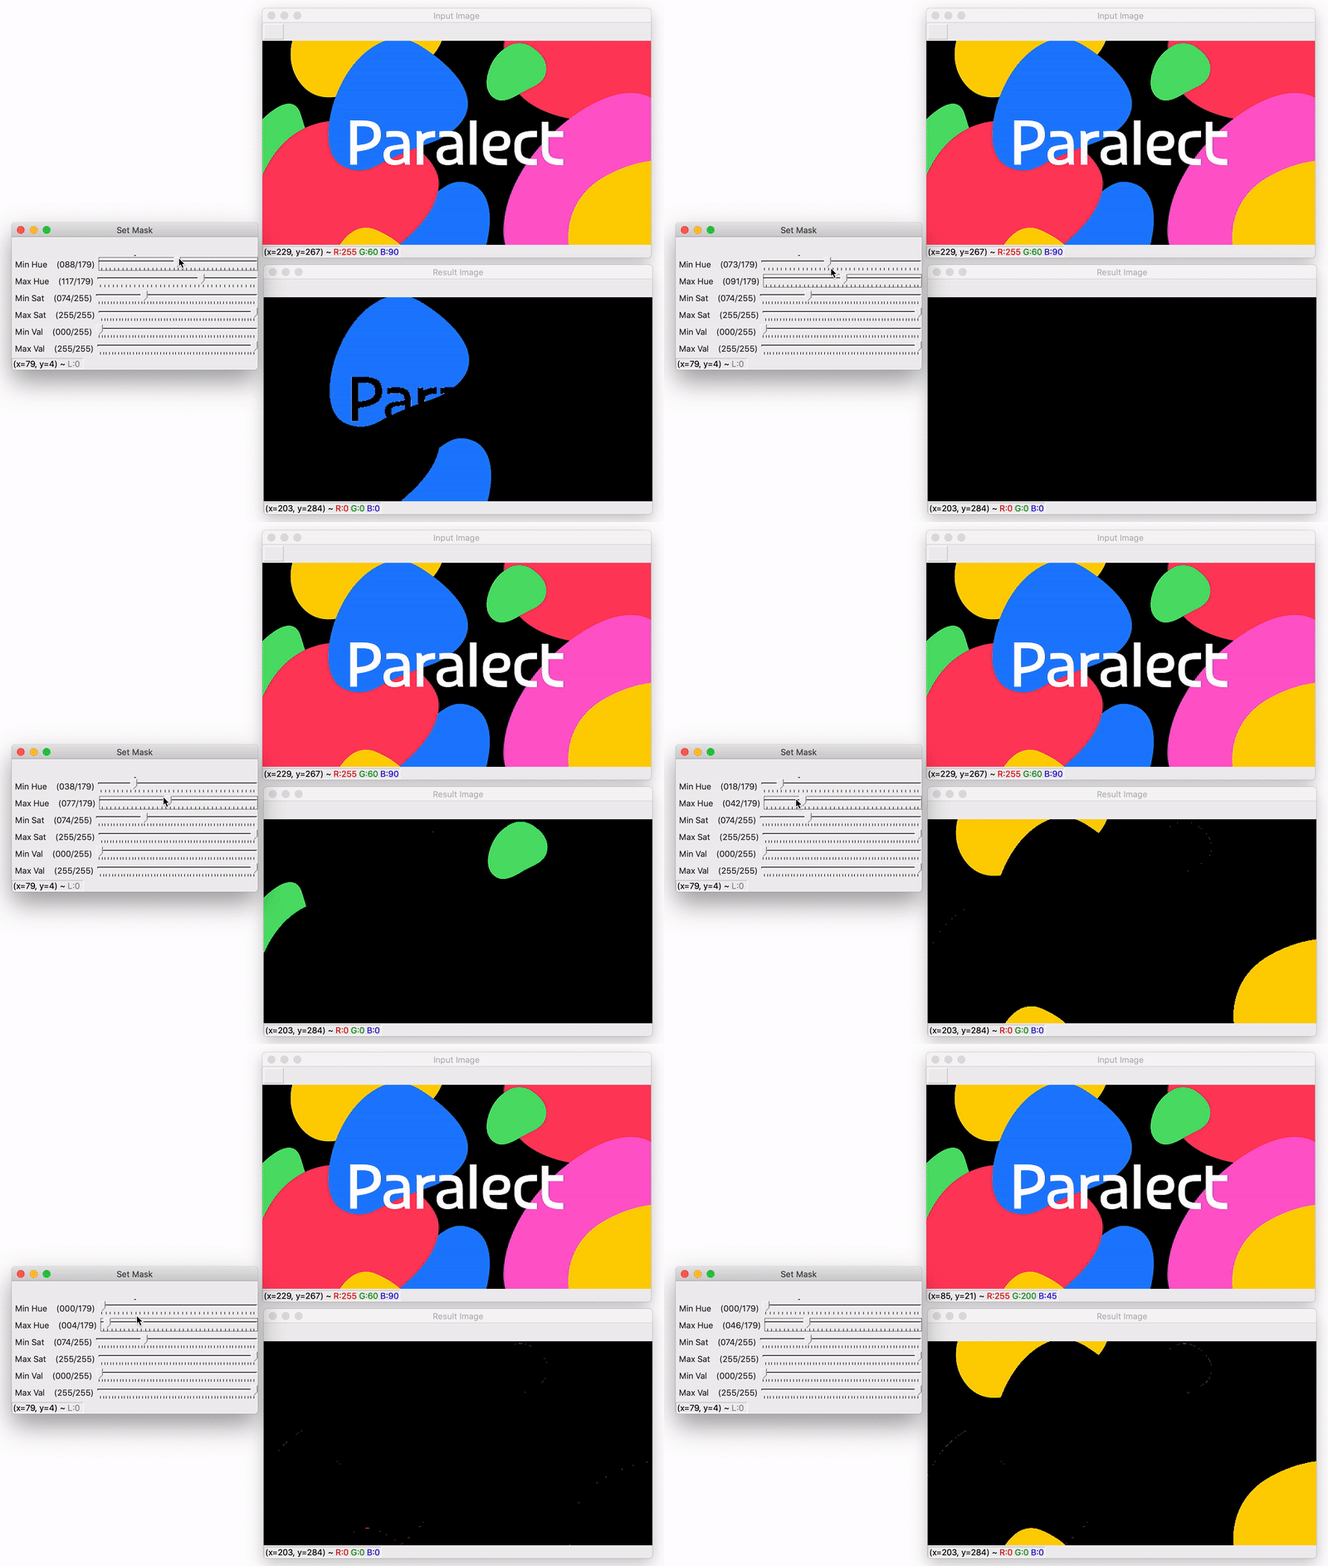
The program starts with a default Hue range (90, 140) which can detect blue objects. Then, we adjust the mask to find green and yellow objects as seen in the demo above.

Object detection from video:

In this second application, we have the same adjustable HSV mask ("Set Mask" window) but this time it masks the video (from the webcam) and produces a resulting masked video.

The program starts with a default Hue range (90, 140) which can detect blue objects. And then, we adjust the mask to find purple and red objects.

What is OpenCV?

Short for Open Computer Vision — OpenCV is exactly what the name implies. An open-source C++ library that tackles real-time computer vision tasks across a wide range of applications. Although it's primary interface is in C++, there are also bindings in Python, Java and MATLAB/OCTAVE.

With over 2500 classic and modern CV and ML algorithms, we prefer to use OpenCV because:

  • It's open-source and available free of cost.
  • It's fast and written in C/C++.
  • It's portable as OpenCV can run on any device that can run C. It runs on both desktop (Windows, Linux, Android, MacOS, FreeBSD, OpenBSD) and mobile (Android, Maemo, iOS).
  • It has low RAM usage.

Some features of OpenCV:

  • 2D and 3D feature toolkits
  • Egomotion estimation
  • Facial recognition system
  • Gesture recognition
  • Human–computer interaction (HCI)
  • Mobile robotics
  • Motion understanding
  • Object identification
  • Segmentation and recognition
  • Stereopsis stereo vision: depth perception from 2 cameras
  • Structure from motion (SFM)
  • Motion tracking
  • Augmented reality

Learn more at opencv.org or on Github.

What is HSV color space?

HSV (hue, saturation, value, also known as HSB [hue, saturation, brightness]) is an alternative representation of the RGB (Red-Green-Blue) color model. Created by computer graphics researchers in the 1970s, it's designed to match more closely to the way our human vision interprets color attributes.
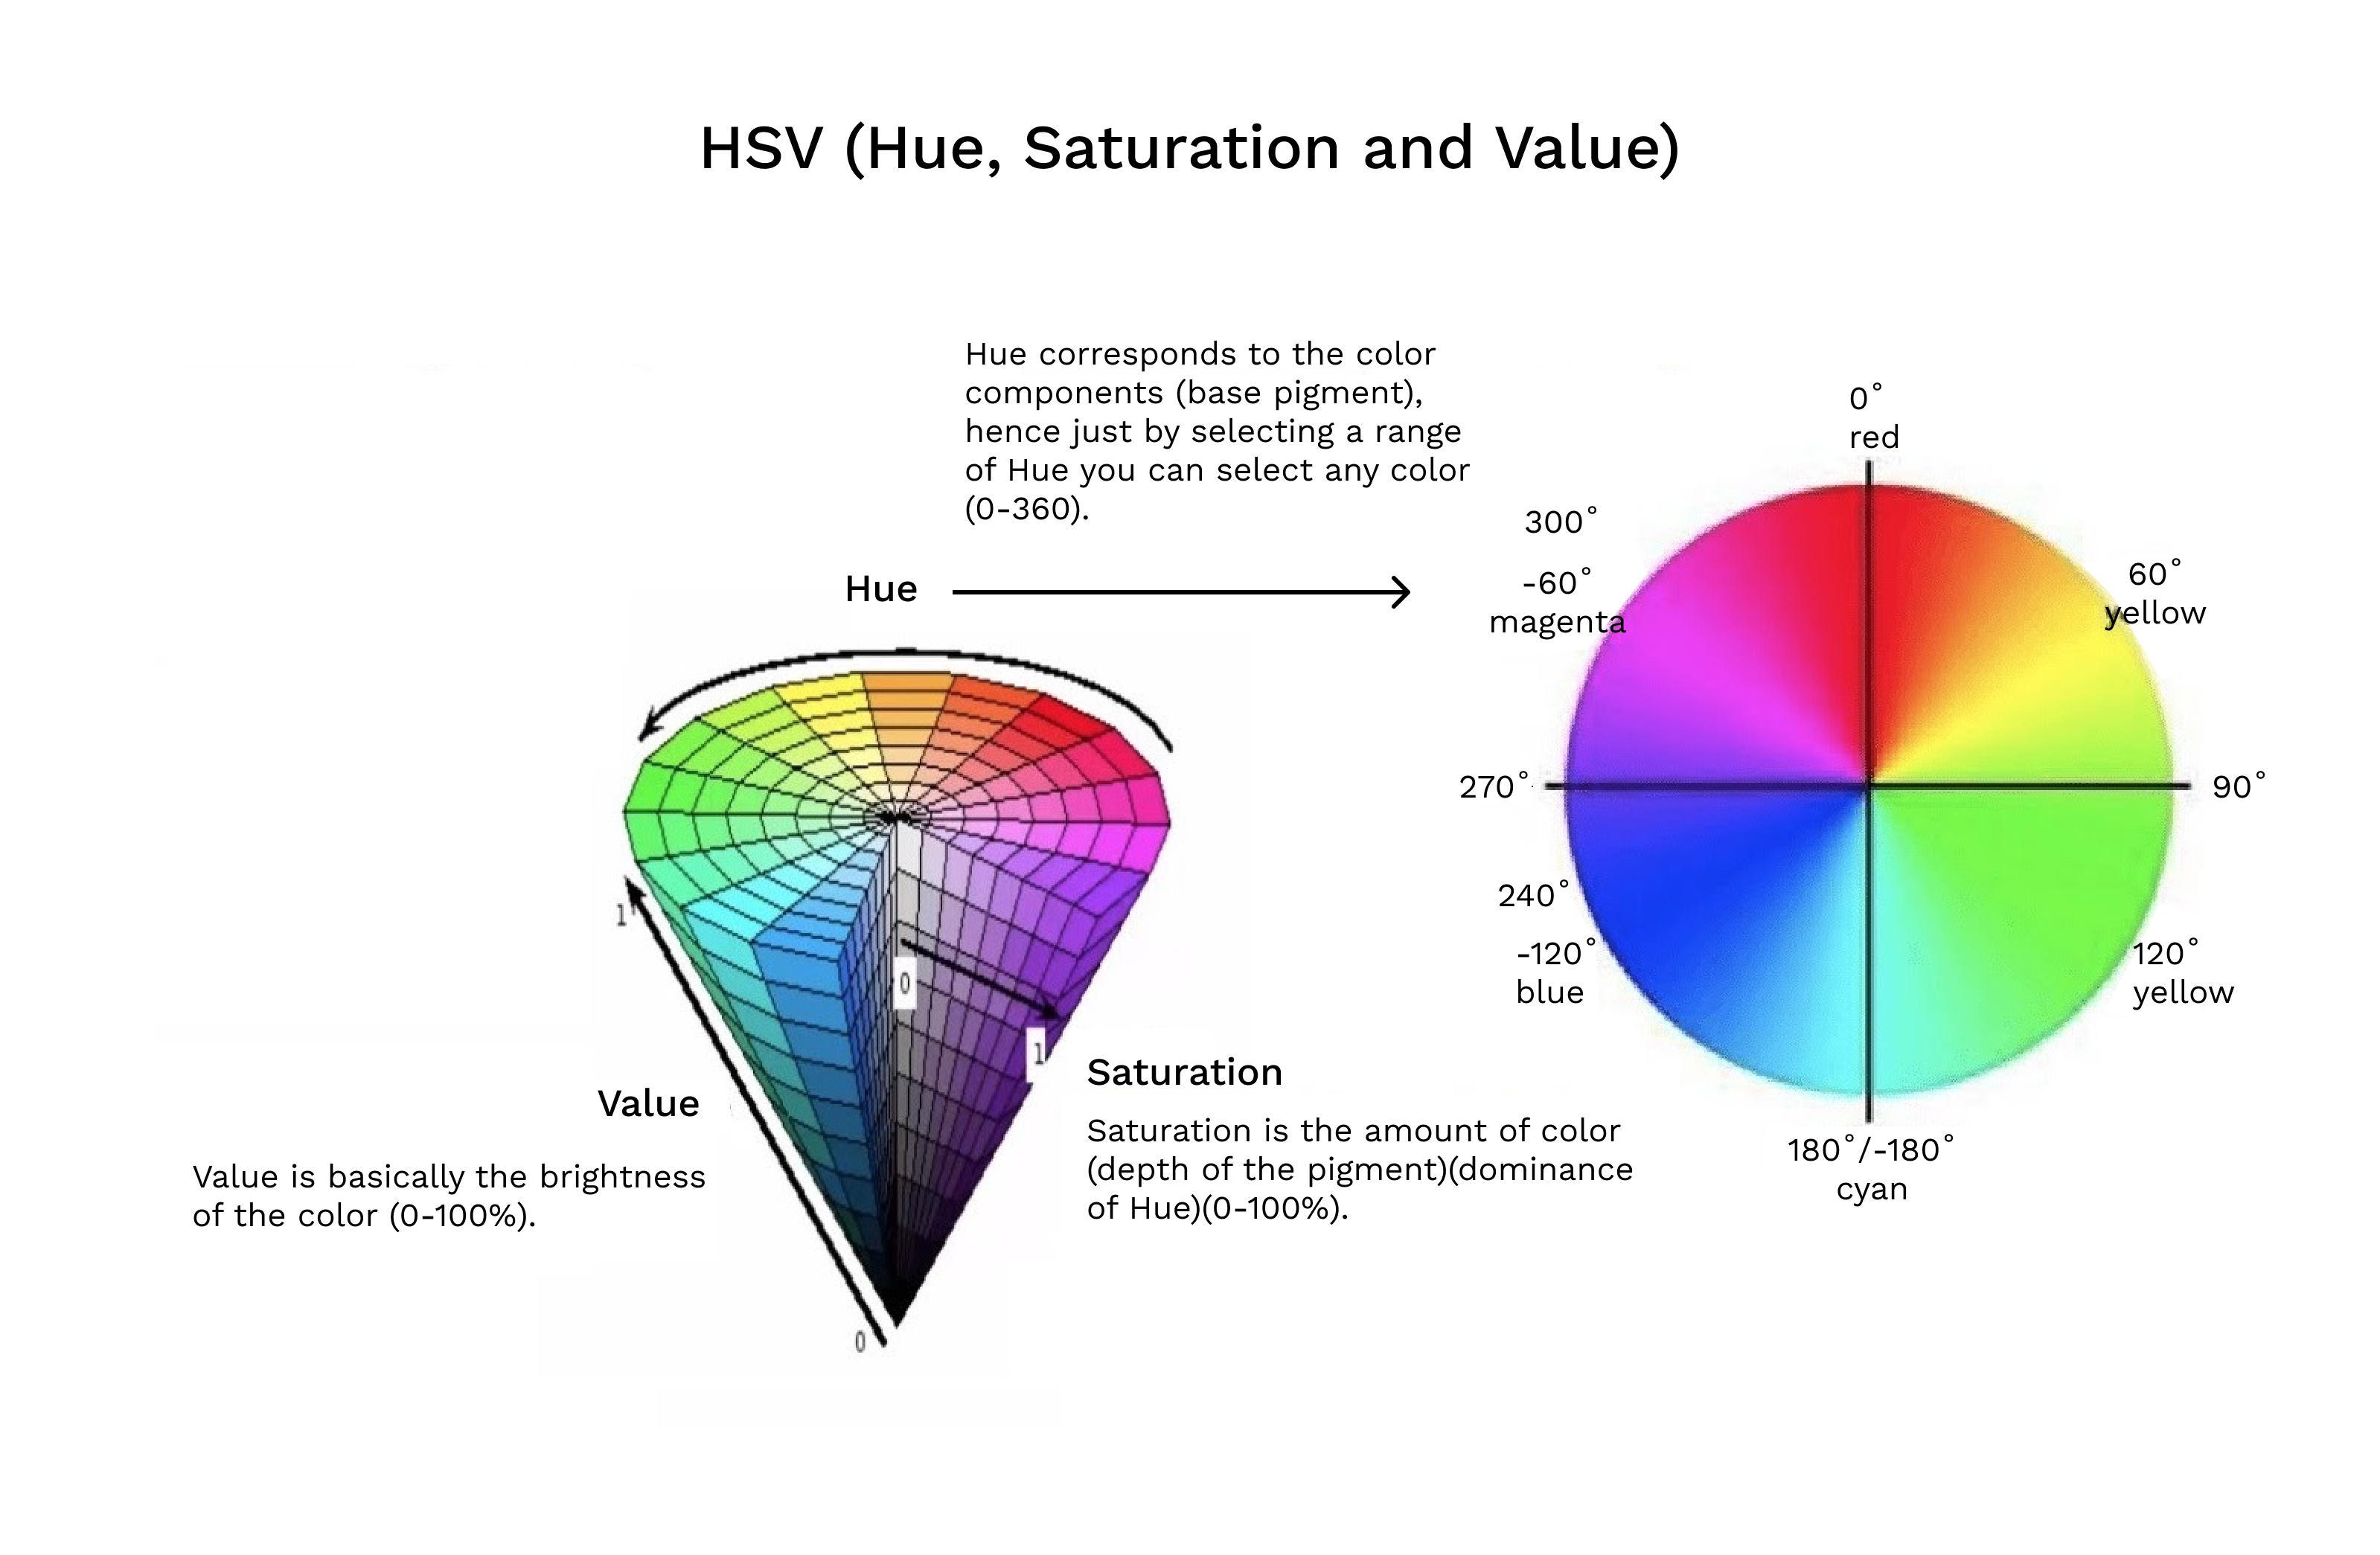
Source

Code (C++ and Python)

In this section, we will see 4 programs: 2 programs (same logic in C++ and Python) for detection from image and 2 programs (same logic in C++ and Python) for detection from video.

The code is heavily commented and mostly readable. So, let's look at the code now which explains itself step by step in the comments. The lines starting with // for C++ and # for Python:

C++ : Object detection from image

int main()
{
//// 1. Create mask settings UI with default HSV range to detect blue color
auto const MASK_WINDOW = "Mask Settings";
cv::namedWindow(MASK_WINDOW, CV_WINDOW_AUTOSIZE);
// HSV range to detect blue color
int minHue = 90, maxHue = 140;
int minSat = 74, maxSat = 255;
int minVal = 0, maxVal = 255;
// Create trackbars of mask settings window
cvCreateTrackbar("Min Hue", MASK_WINDOW, &minHue, 179);
cvCreateTrackbar("Max Hue", MASK_WINDOW, &maxHue, 179);
cvCreateTrackbar("Min Sat", MASK_WINDOW, &minSat, 255);
cvCreateTrackbar("Max Sat", MASK_WINDOW, &maxSat, 255);
cvCreateTrackbar("Min Val", MASK_WINDOW, &minVal, 255);
cvCreateTrackbar("Max Val", MASK_WINDOW, &maxVal, 255);
while (true) {
//// 2. Read and convert image to HSV color space
cv::Mat inputImage { cv::imread("paralect.png", cv::IMREAD_COLOR) };
cv::Mat inputImageHSV;
cv::cvtColor(inputImage, inputImageHSV, cv::COLOR_BGR2HSV);
//// 3. Create mask and result (masked) image
cv::Mat mask;
// params: input array, lower boundary array, upper boundary array, output array
cv::inRange(
inputImageHSV,
cv::Scalar(minHue, minSat, minVal),
cv::Scalar(maxHue, maxSat, maxVal),
mask
);
cv::Mat resultImage;
// params: src1 array, src2 array, output array, mask
cv::bitwise_and(inputImage, inputImage, resultImage, mask);
//// 4. Show images
cv::imshow("Input Image", inputImage);
cv::imshow("Result (Masked) Image", resultImage);
// imshow("Mask", mask);
//// Wait for 'esc' (27) key press for 30ms. If pressed, end program.
if (cv::waitKey(30) == 27) break;
}
}

Python: Object detection from image

## 1. Create "Set Mask" window with default HSV range to detect blue color
SET_MASK_WINDOW = "Set Mask"
cv.namedWindow(SET_MASK_WINDOW, cv.WINDOW_NORMAL)
cv.createTrackbar("Min Hue", SET_MASK_WINDOW, 90, 179, noop)
cv.createTrackbar("Max Hue", SET_MASK_WINDOW, 140, 179, noop)
cv.createTrackbar("Min Sat", SET_MASK_WINDOW, 74, 255, noop)
cv.createTrackbar("Max Sat", SET_MASK_WINDOW, 255, 255, noop)
cv.createTrackbar("Min Val", SET_MASK_WINDOW, 0, 255, noop)
cv.createTrackbar("Max Val", SET_MASK_WINDOW, 255, 255, noop)
while True:
## 2. Read and convert image to HSV color space
image = cv.imread('paralect.png')
imageHsv = cv.cvtColor(image, cv.COLOR_BGR2HSV)
## 3. Get min and max HSV values from Set Mask window
minHue = cv.getTrackbarPos("Min Hue", SET_MASK_WINDOW)
maxHue = cv.getTrackbarPos("Max Hue", SET_MASK_WINDOW)
minSat = cv.getTrackbarPos("Min Sat", SET_MASK_WINDOW)
maxSat = cv.getTrackbarPos("Max Sat", SET_MASK_WINDOW)
minVal = cv.getTrackbarPos("Min Val", SET_MASK_WINDOW)
maxVal = cv.getTrackbarPos("Max Val", SET_MASK_WINDOW)
minHsv = np.array([minHue, minSat, minVal])
maxHsv = np.array([maxHue, maxSat, maxVal])
## 4. Create mask and result (masked) image
# params: input array, lower boundary array, upper boundary array
mask = cv.inRange(imageHsv, minHsv, maxHsv)
# params: src1 array, src2 array, mask
resultImage = cv.bitwise_and(image, image, mask=mask)
## 5. Show images
cv.imshow("Input Image", image)
# cv.imshow("Mask", mask) # optional
cv.imshow("Result Image", resultImage)
if cv.waitKey(1) == 27: break # Wait Esc key to end program
view raw detect-image.py hosted with ❤ by GitHub

C++ : Object detection from video

int main()
{
//// 1. Create mask control window with default HSV range to detect blue color
auto const MASK_WINDOW = "Mask Settings";
cv::namedWindow(MASK_WINDOW, CV_WINDOW_AUTOSIZE);
// HSV range to detect blue color
int minHue = 90, maxHue = 140;
int minSat = 74, maxSat = 255;
int minVal = 0, maxVal = 255;
// Create trackbars in mask settings window
cvCreateTrackbar("Min Hue", MASK_WINDOW, &minHue, 179);
cvCreateTrackbar("Max Hue", MASK_WINDOW, &maxHue, 179);
cvCreateTrackbar("Min Sat", MASK_WINDOW, &minSat, 255);
cvCreateTrackbar("Max Sat", MASK_WINDOW, &maxSat, 255);
cvCreateTrackbar("Min Val", MASK_WINDOW, &minVal, 255);
cvCreateTrackbar("Max Val", MASK_WINDOW, &maxVal, 255);
//// 2. Capture from default camera
cv::VideoCapture videoCapture(0);
while (true) {
//// 3. Capture and convert video to HSV color space
cv::Mat inputVideo;
videoCapture.read(inputVideo);
cv::flip(inputVideo, inputVideo, 1);
cv::Mat inputVideoHSV;
cv::cvtColor(inputVideo, inputVideoHSV, cv::COLOR_BGR2HSV);
//// 4. Create mask and result (masked) video
cv::Mat mask;
// params: input array, lower boundary array, upper boundary array, output array
cv::inRange(
inputVideoHSV,
cv::Scalar(minHue, minSat, minVal),
cv::Scalar(maxHue, maxSat, maxVal),
mask
);
cv::Mat resultVideo;
// params: src1 array, src2 array, output array, mask
cv::bitwise_and(inputVideo, inputVideo, resultVideo, mask);
//// 5. Show videos
cv::imshow("Input Video", inputVideo);
cv::imshow("Result (Masked) Video", resultVideo);
// cv::imshow("Mask", mask);
//// Wait for 'esc' (27) key press for 30ms. If pressed, end program.
if (cv::waitKey(30) == 27) break;
}
}

Python: Object detection from video

## 1. Create "Set Mask" window with default HSV range to detect blue color
SET_MASK_WINDOW = "Set Mask"
cv.namedWindow(SET_MASK_WINDOW, cv.WINDOW_NORMAL)
cv.createTrackbar("Min Hue", SET_MASK_WINDOW, 90, 179, noop)
cv.createTrackbar("Max Hue", SET_MASK_WINDOW, 140, 179, noop)
cv.createTrackbar("Min Sat", SET_MASK_WINDOW, 74, 255, noop)
cv.createTrackbar("Max Sat", SET_MASK_WINDOW, 255, 255, noop)
cv.createTrackbar("Min Val", SET_MASK_WINDOW, 0, 255, noop)
cv.createTrackbar("Max Val", SET_MASK_WINDOW, 255, 255, noop)
## 2. Capture from default camera
videoCapture = cv.VideoCapture(0)
while True:
## 3. Capture video from camera and convert to HSV color space
_, capturedVideo = videoCapture.read() # video
# rotate video 180 degrees (it starts upside down on Windows)
# capturedVideo = cv.flip(capturedVideo, 1) # Win
capturedVideo = cv.resize(capturedVideo, None, None, fx=0.5, fy=0.5) # macOS
capturedVideoHsv = cv.cvtColor(capturedVideo, cv.COLOR_BGR2HSV)
## 4. Get min and max HSV values from Set Mask window
minHue = cv.getTrackbarPos("Min Hue", SET_MASK_WINDOW)
maxHue = cv.getTrackbarPos("Max Hue", SET_MASK_WINDOW)
minSat = cv.getTrackbarPos("Min Sat", SET_MASK_WINDOW)
maxSat = cv.getTrackbarPos("Max Sat", SET_MASK_WINDOW)
minVal = cv.getTrackbarPos("Min Val", SET_MASK_WINDOW)
maxVal = cv.getTrackbarPos("Max Val", SET_MASK_WINDOW)
minHsv = np.array([minHue, minSat, minVal])
maxHsv = np.array([maxHue, maxSat, maxVal])
## 5. Create mask and result (masked) video
# params: input array, lower boundary array, upper boundary array
mask = cv.inRange(capturedVideoHsv, minHsv, maxHsv)
# params: src1 array, src2 array, mask
resultVideo = cv.bitwise_and(capturedVideo, capturedVideo, mask=mask)
## 6. Show videos
cv.imshow("Captured Video", capturedVideo)
# cv.imshow("Mask", mask) # optional
cv.imshow("Result (Masked) Video", resultVideo)
if cv.waitKey(1) == 27: break # Wait Esc key to end program
view raw detect-video.py hosted with ❤ by GitHub

You can check out the source code here.

This wraps up our three-part series on Computer Vision — part one explored Image Similarity Search and part two outlined Face Recognition also using OpenCV, Python and C++.

Next up, we'll dive into Transfer Learning 💡

Thanks for reading 🙏

Previous Article
Transfer Learning Applied: 97% Accuracy in 30 Seconds
Next Article
Data Warehouse — optimal organization of your product data

Get the useful tips on building startups to your email

Thank you! Your submission has been received!
Oops! Something went wrong while submitting the form.